Process Crawled or Local Images and Data
(Chinese Doc:https://deepghs.github.io/waifuc/main/tutorials-CN/process_images/index.html )
For data that is about to be crawled or has already been crawled, further processing is often needed to make it suitable for LoRA training. This section will introduce such functionalities in waifuc.
Important Note:
Note
When processing crawled data, all data sources support a caching mechanism. This means you can temporarily store data using a defined variable. For the sake of convenience, we will demonstrate using
LocalSourceto load local data. In reality, actions can be used with any data source.Waifuc provides a variety of preset actions. Due to space limitations, not all features will be demonstrated here. A comprehensive list of functions can be found in the documentation.
How to Process Data
In waifuc, we use actions to process the data obtained, as shown in the examples earlier.
We can use the attach method of the data source to add an action to the data source, creating a new data source. Here’s an example:
1from waifuc.source import LocalSource
2
3if __name__ == '__main__':
4    # define "source" to cache the data clawed from source.
5    source = LocalSource('/data/mydataset')
6    source = source.attach(
7        XXXAction()  # now source's output will be items processed by XXXAction
8    )  # and then they'll be cached by new "source" that is different
However, it’s important to note that every time the attach method is called, a new data source will be generated. It won’t change the original data source. Therefore, the following usage is incorrect, and the action in the attach method will not be effectively added:
 1from waifuc.export import SaveExporter
 2from waifuc.source import LocalSource
 3
 4if __name__ == '__main__':
 5    source = LocalSource('/data/mydataset')
 6    # WRONG USAGE!!!!! no variable for caching the processed source
 7    source.attach(
 8        XXXAction()
 9    )
10
11    # these images will NOT! NOT! NOT! be processed by XXXAction
12    source.export(SaveExporter('/data/dstdataset'))
Common Actions and Usage Examples
ModeConvertAction
ModeConvertAction is a very commonly used action. Since actual images often come in various formats such as grayscale, binary, RGB, RGBA, etc. (see: Pillow Modes), we need to convert the mode of the images to facilitate further processing by other actions. Here’s how you can use it:
 1from waifuc.action import ModeConvertAction
 2from waifuc.export import SaveExporter
 3from waifuc.source import LocalSource
 4
 5if __name__ == '__main__':
 6    source = LocalSource('/data/mydataset')
 7    source = source.attach(
 8        ModeConvertAction(mode='RGB', force_background='white'),
 9    )
10
11    source.export(SaveExporter('/data/dstdataset'))
In this code, ModeConvertAction will convert all images to the RGB mode. For images with a transparent background (e.g., PNG images in RGBA format), it will fill the background with white.
Considering the requirements of many subsequent action stages for image mode and to avoid format incompatibility issues during data saving, it is recommended to add this action as the first action in most cases.
FirstNSelectAction
For data sources, we often want to keep only the first several data items. Furthermore, for web data sources, limiting the number of images fetched is essential to ensure the finiteness of the process. Therefore, we can use FirstNSelectAction to truncate the data stream, as shown below:
 1from waifuc.action import FirstNSelectAction
 2from waifuc.export import SaveExporter
 3from waifuc.source import LocalSource
 4
 5if __name__ == '__main__':
 6    source = LocalSource('/data/mydataset')
 7    source = source.attach(
 8        FirstNSelectAction(100)
 9    )
10
11    source.export(SaveExporter('/data/dstdataset'))
This code will retain only the first 100 images read from /data/mydataset and save them to /data/dstdataset.
It’s worth noting that there is a more concise way to use FirstNSelectAction, as shown below:
1from waifuc.export import SaveExporter
2from waifuc.source import LocalSource
3
4if __name__ == '__main__':
5    source = LocalSource('/data/mydataset')
6    source = source[:100]
7
8    source.export(SaveExporter('/data/dstdataset'))
Yes, this code is equivalent to the code using FirstNSelectAction. This is a concise form frequently used in the earlier content.
NoMonochromeAction
When processing training data, monochrome images (as defined here) often sneak in. In most cases, these images are not desirable because they can have a negative impact on the model’s training. Therefore, we want to filter them out. In waifuc, this is very simple. For example, for the following images stored in /data/raw:
We can use the following code to filter out monochrome images:
 1from waifuc.action import NoMonochromeAction
 2from waifuc.export import SaveExporter
 3from waifuc.source import LocalSource
 4
 5if __name__ == '__main__':
 6    source = LocalSource('/data/raw')
 7    source = source.attach(
 8        NoMonochromeAction(),
 9    )
10
11    source.export(SaveExporter('/data/dstdataset'))
However, note that depending on the content of the images, this action may also filter out images with color that are too similar to monochrome images.
Non-monochrome images will be saved in the /data/dstdataset path, as shown below:
ClassFilterAction
Similarly, when processing training data, there are often manga and 3D images mixed in. In most cases, we want to exclude them. This is also very easy for waifuc. For example, for the following image:
You can use the following code to filter out manga (images with comic frames) and 3D images:
 1from waifuc.action import ClassFilterAction
 2from waifuc.export import SaveExporter
 3from waifuc.source import LocalSource
 4
 5if __name__ == '__main__':
 6    source = LocalSource('/data/raw')
 7    # only keep the illustrations and bangumi screenshots
 8    source = source.attach(
 9        ClassFilterAction(['illustration', 'bangumi']),
10    )
11
12    source.export(SaveExporter('/data/dstdataset'))
The final saved images are accurately filtered out:
FilterSimilarAction
When fetching data, we often need to filter out identical or similar images. In waifuc, there is a FilterSimilarAction based on the LPIPS model to filter similar images. For example, for the following 10 images:
You can use the following code to filter out similar images:
 1from waifuc.action import FilterSimilarAction
 2from waifuc.export import SaveExporter
 3from waifuc.source import LocalSource
 4
 5if __name__ == '__main__':
 6    source = LocalSource('/data/raw')
 7    source = source.attach(
 8        FilterSimilarAction(),
 9    )
10
11    source.export(SaveExporter('/data/dstdataset'))
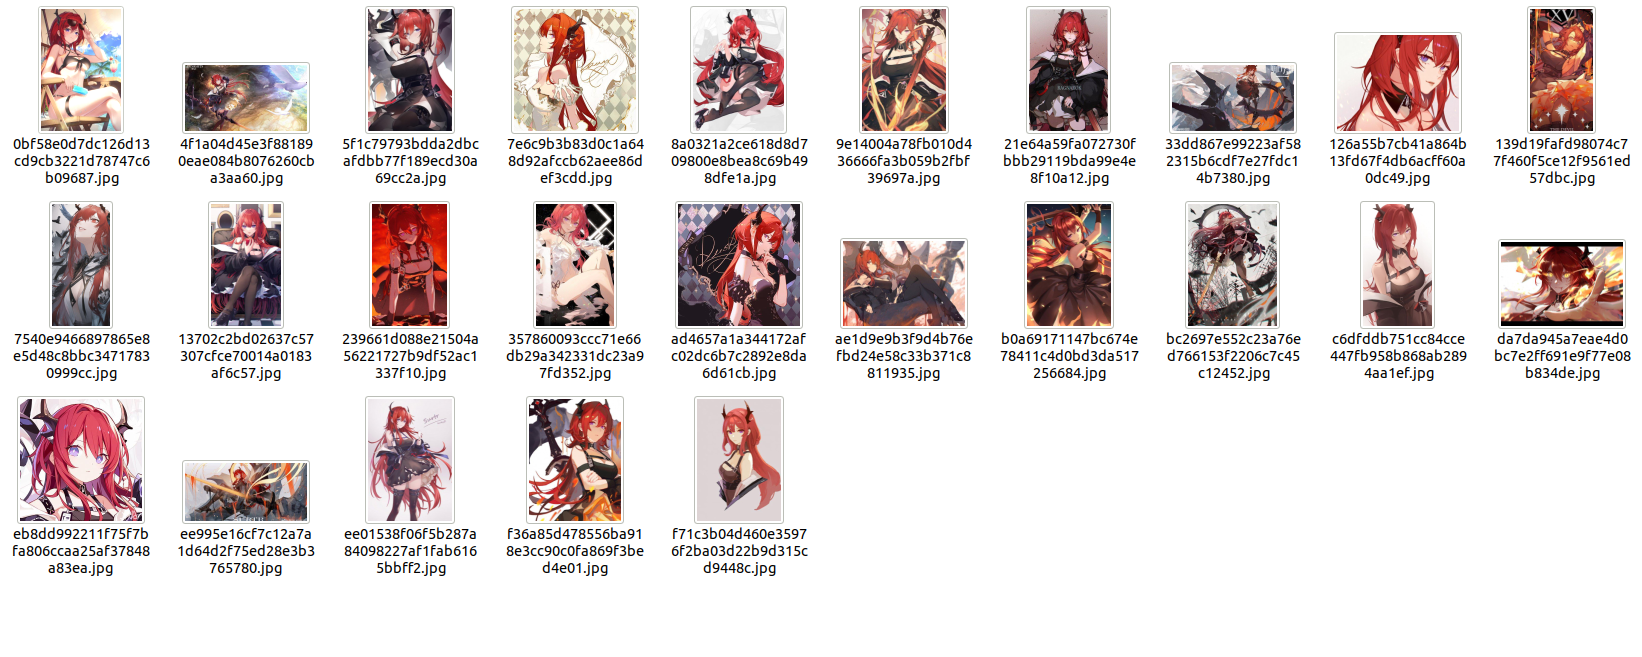
The final images obtained are as follows:
TaggingAction
To train a LoRA dataset, it is generally necessary to label the content of the images. The specific format is an image plus a text file with the same name. For example, for the following set of images:
You can use the following code to generate tags for them and export them using TextureInversionExporter:
 1from waifuc.action import TaggingAction
 2from waifuc.export import TextualInversionExporter
 3from waifuc.source import LocalSource
 4
 5if __name__ == '__main__':
 6    source = LocalSource('/data/raw')
 7    source = source.attach(
 8        TaggingAction(),
 9    )
10
11    source.export(TextualInversionExporter('/data/dstdataset'))
The resulting dataset looks like this:
Note
TaggingActionitself does not directly export images in the image+txt data format. It only generates tag information for images and stores it in the image’s metadata. The actual export in the format required for LoRA training occurs only whenTextualInversionExporteris used for the final export.When fetching images from some websites (such as Danbooru), the images on the website already have tag information. In this case, if you directly use `TaggingAction`, it will skip images with pre-existing tag information, resulting in tag information in the final exported dataset coming entirely from the crawled website. If you want to regenerate tag information for each image, you need to use
TagginngAction(force=True)for forced tagging, replacing the original tagging information with information generated by the tagger.
PersonSplitAction
When fetching images, you may encounter images with multiple people. In some cases, we may want to split the various characters in the image to facilitate further filtering. In such cases, you can use PersonSplitAction. For example, for the following image:
You can use the following code to split the image:
 1from waifuc.action import PersonSplitAction
 2from waifuc.export import SaveExporter
 3from waifuc.source import LocalSource
 4
 5if __name__ == '__main__':
 6    source = LocalSource('/data/raw')
 7    source = source.attach(
 8        PersonSplitAction(),
 9    )
10
11    source.export(SaveExporter('/data/dstdataset'))
The final split and saved images look like this:
FaceCountAction
Waifuc can also filter based on the number of faces in an image. For example, for the following set of images:
You can use the following code to filter out images with only one face:
 1from waifuc.action import FaceCountAction
 2from waifuc.export import SaveExporter
 3from waifuc.source import LocalSource
 4
 5if __name__ == '__main__':
 6    source = LocalSource('/data/raw')
 7    source = source.attach(
 8        FaceCountAction(1),
 9    )
10
11    source.export(SaveExporter('/data/dstdataset'))
The resulting dataset looks like this, with photos containing multiple faces filtered out:
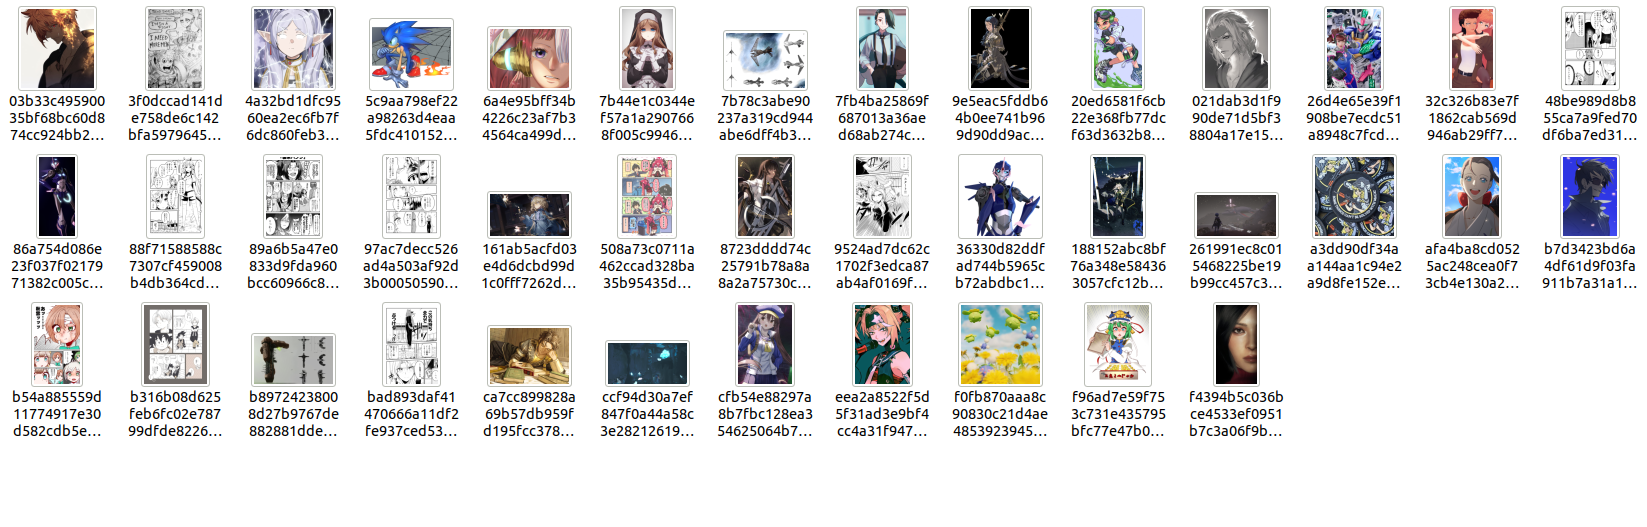
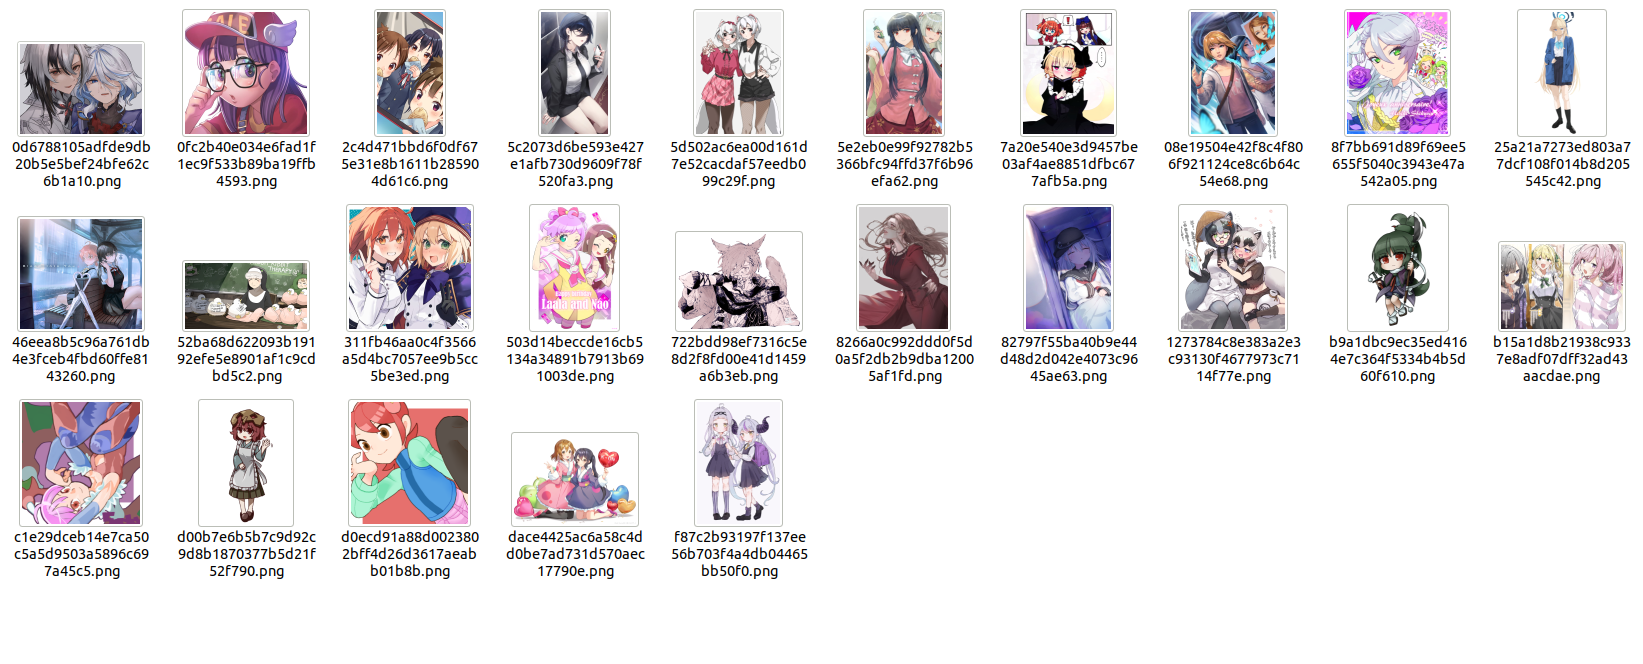
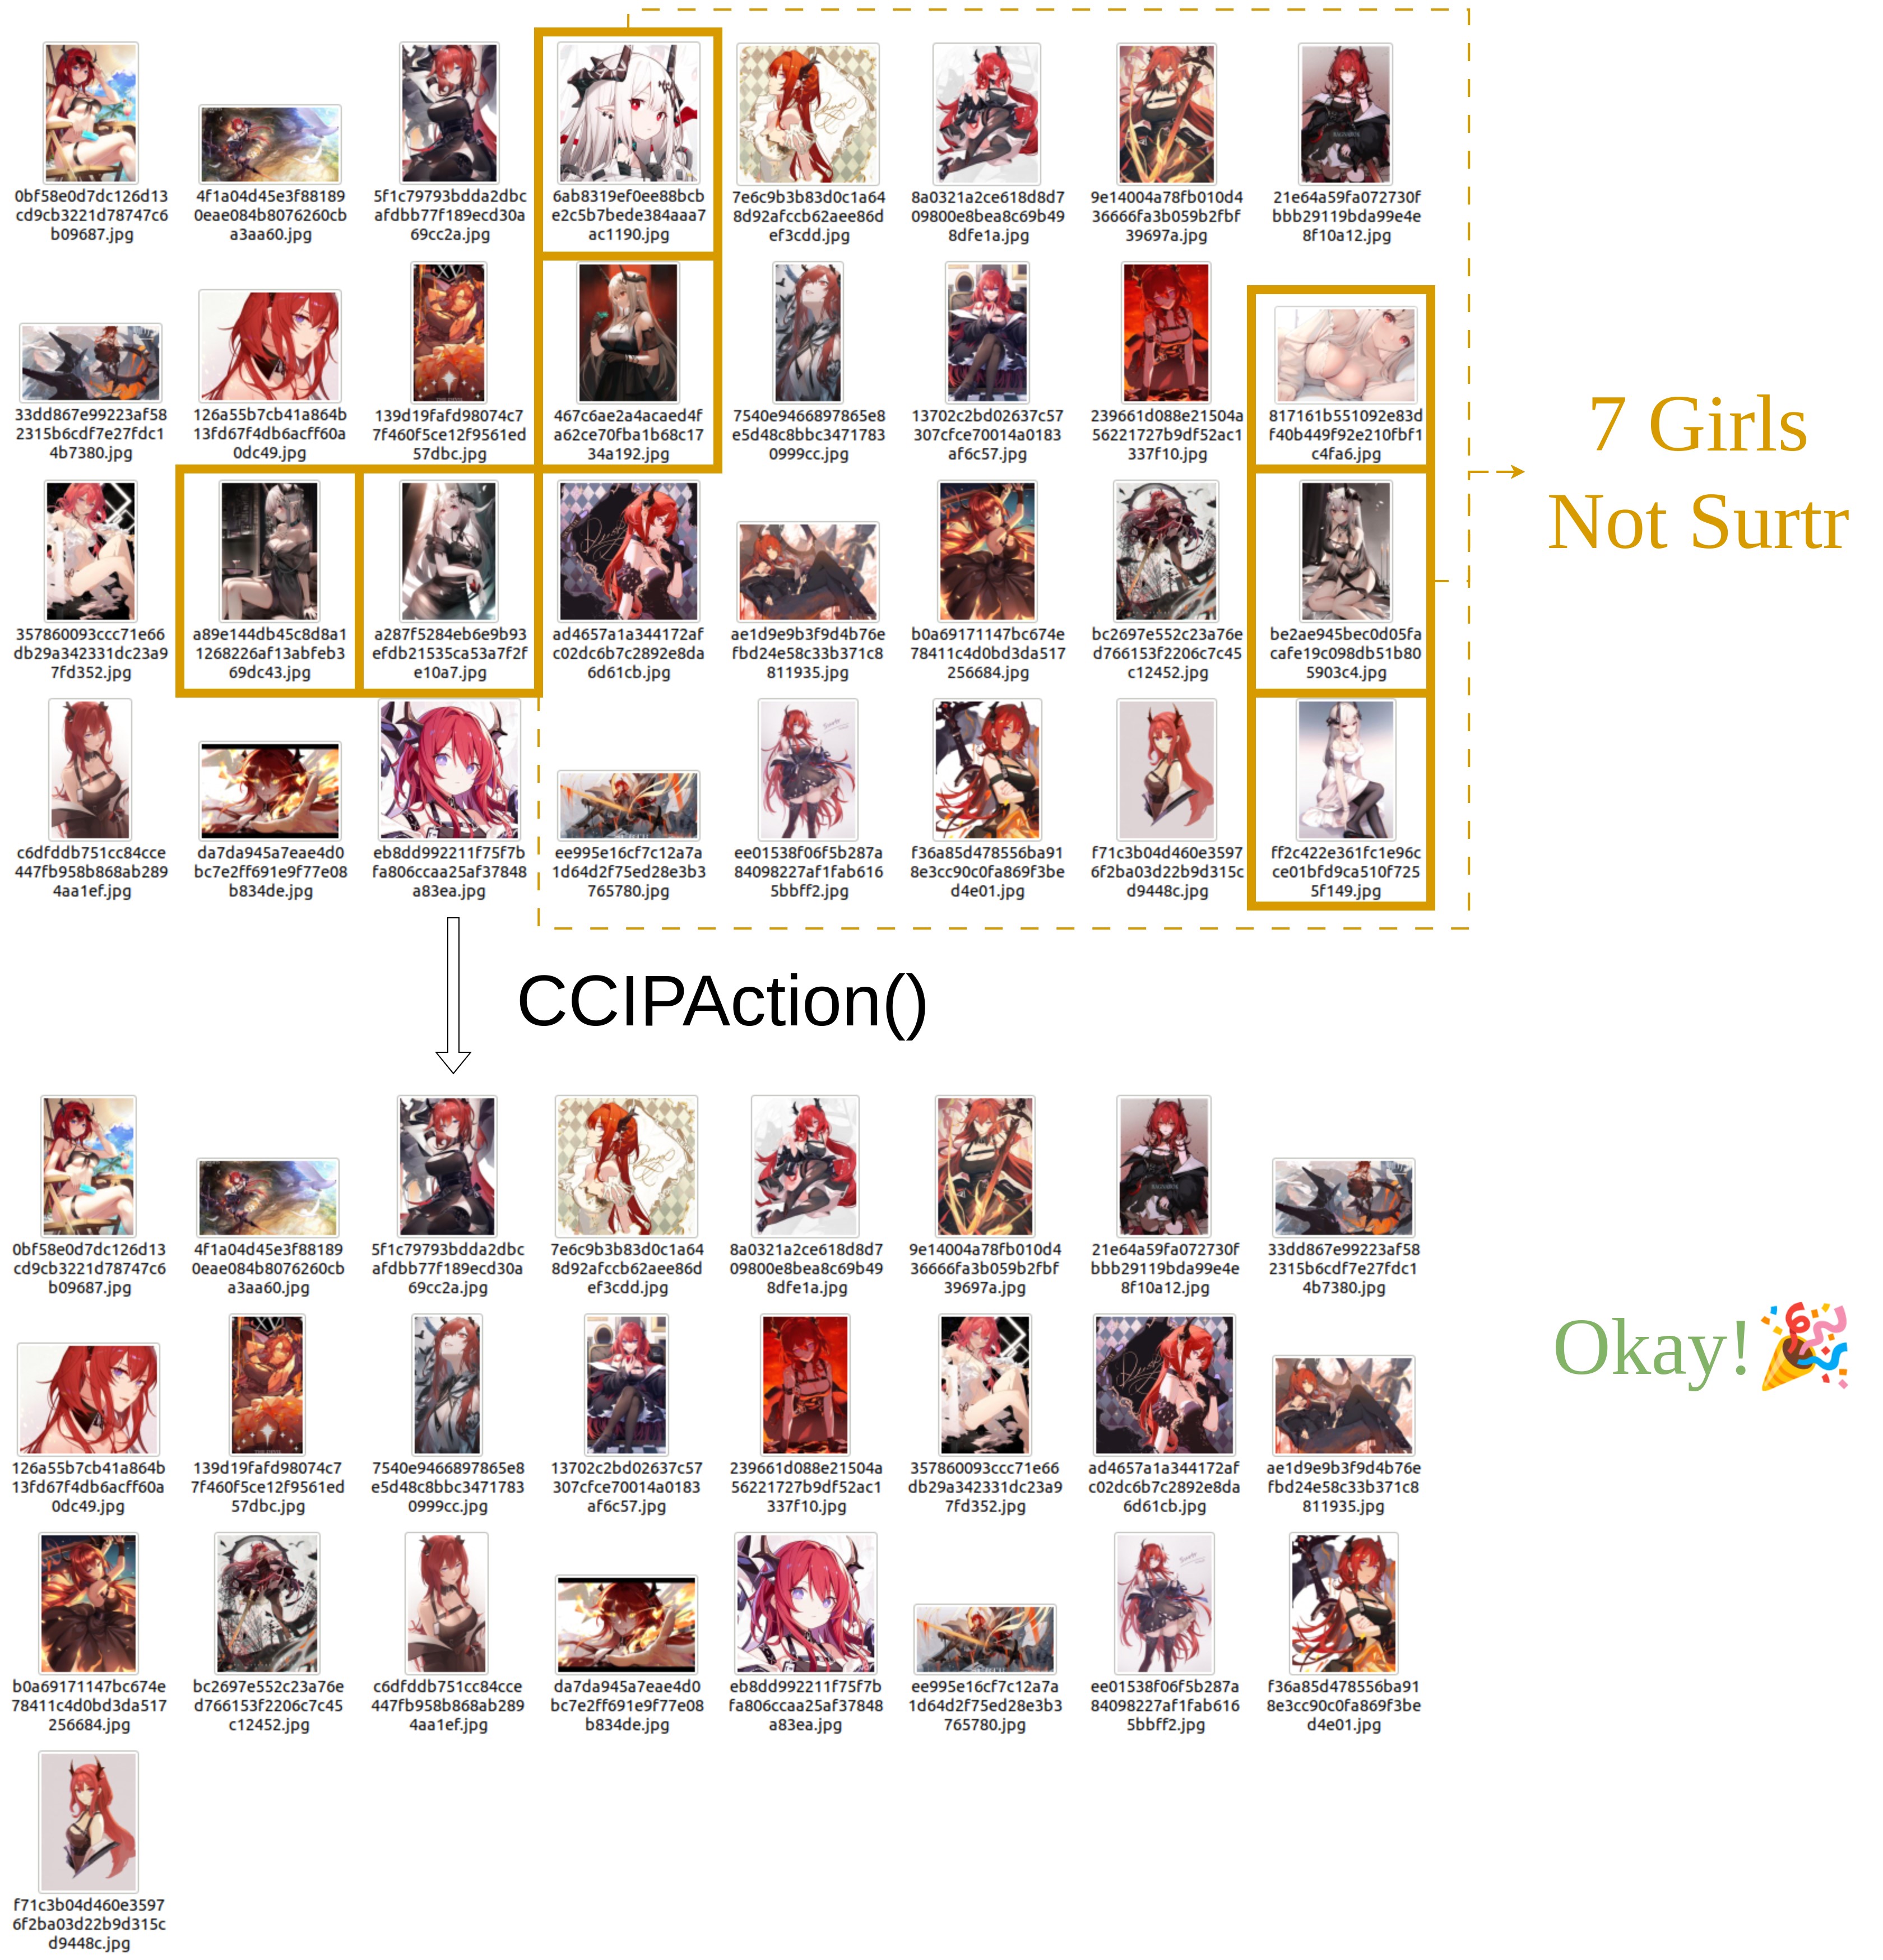
CCIPAction
When fetching data, there is often a situation where irrelevant characters are mixed in. Even for websites with clear character tags like Danbooru, there will still be a certain percentage of irrelevant characters. This problem is often difficult to completely avoid through common tagging mechanisms, but such impurities can have a significant negative impact on the quality of LoRA training.
To address this issue, waifuc provides CCIPAction, which can automatically filter out irrelevant characters from the data source. For example, in the following code:
 1from waifuc.action import CCIPAction
 2from waifuc.export import SaveExporter
 3from waifuc.source import LocalSource
 4
 5if __name__ == '__main__':
 6    source = LocalSource('/data/raw')
 7    source = source.attach(
 8        CCIPAction(),
 9    )
10
11    source.export(SaveExporter('/data/dstdataset'))
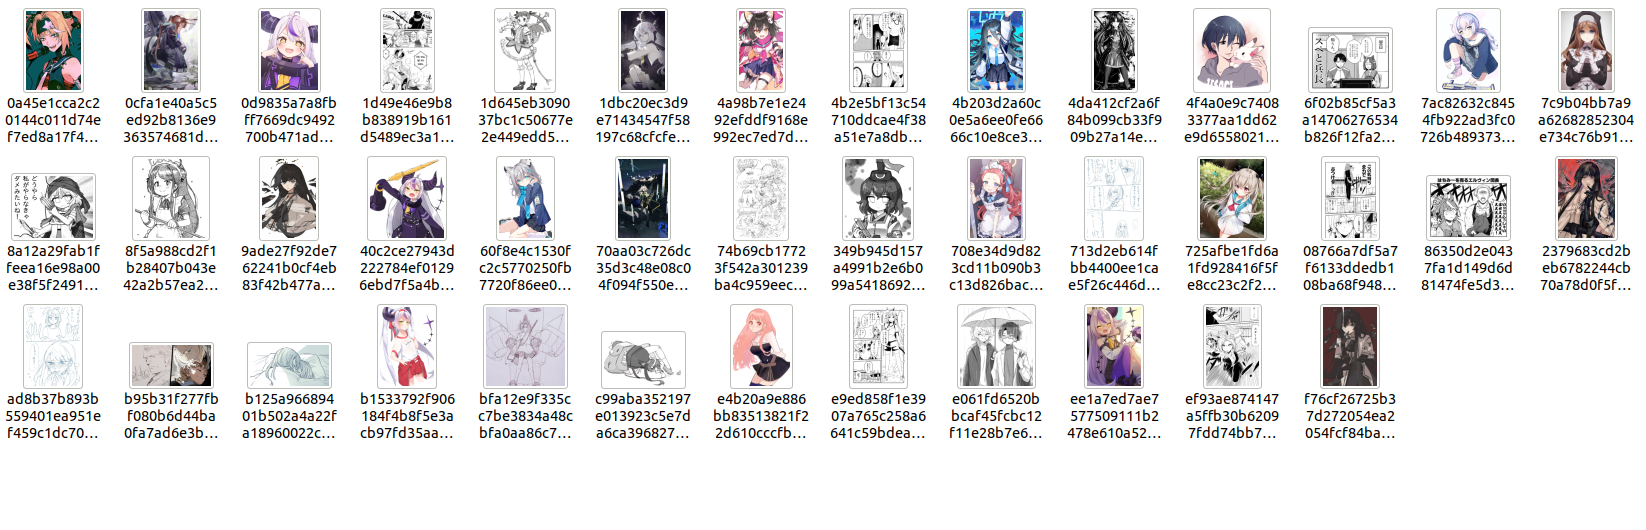
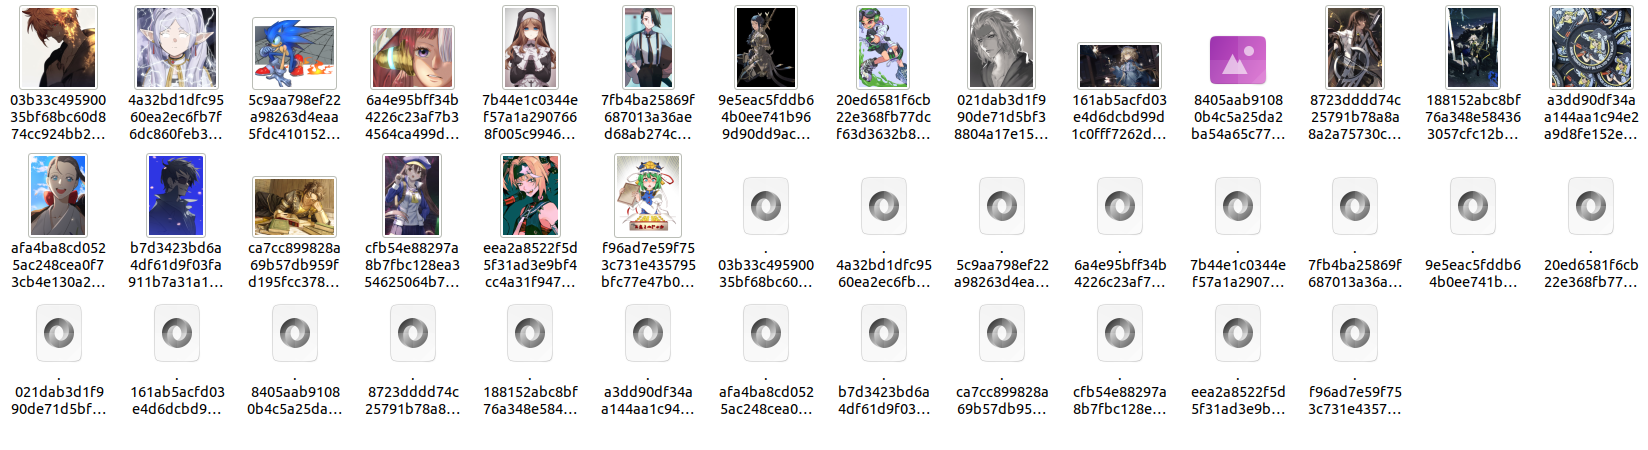
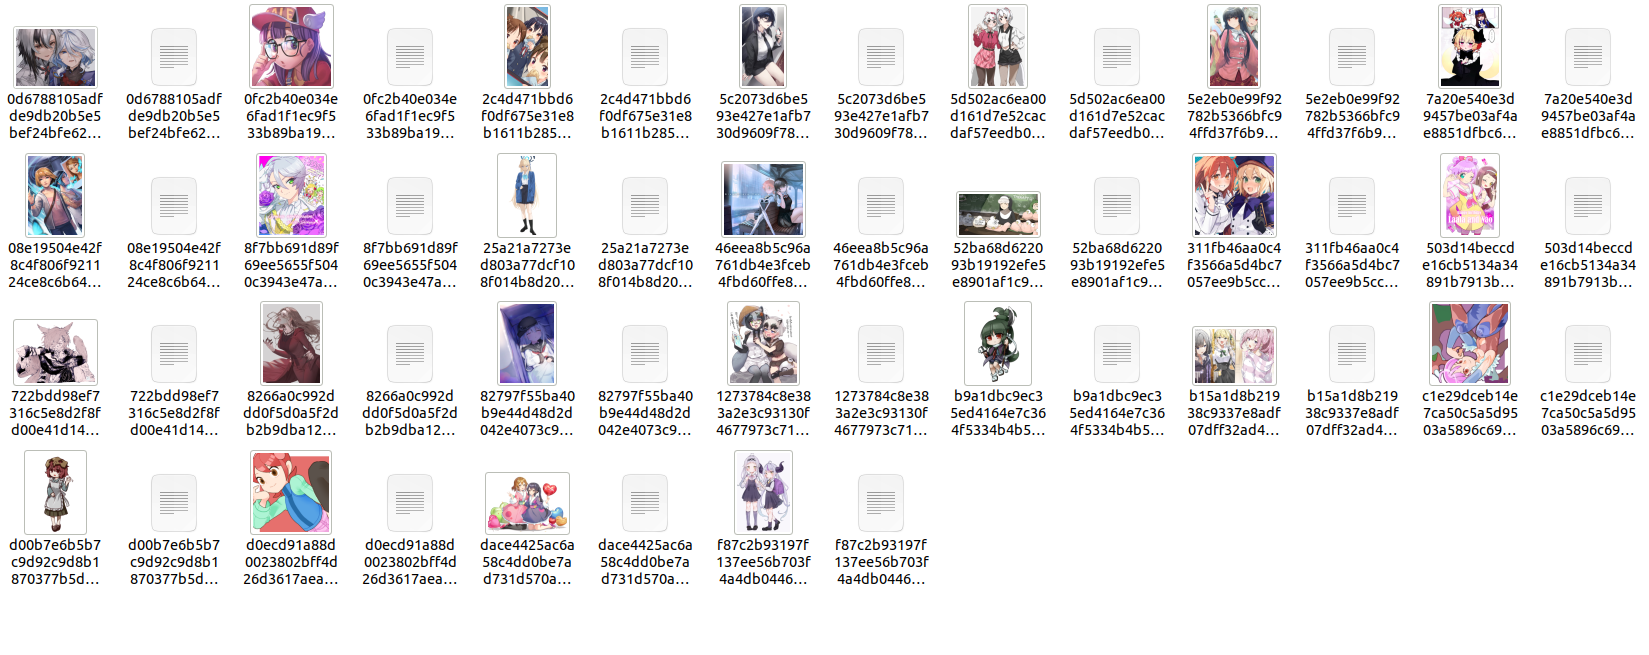
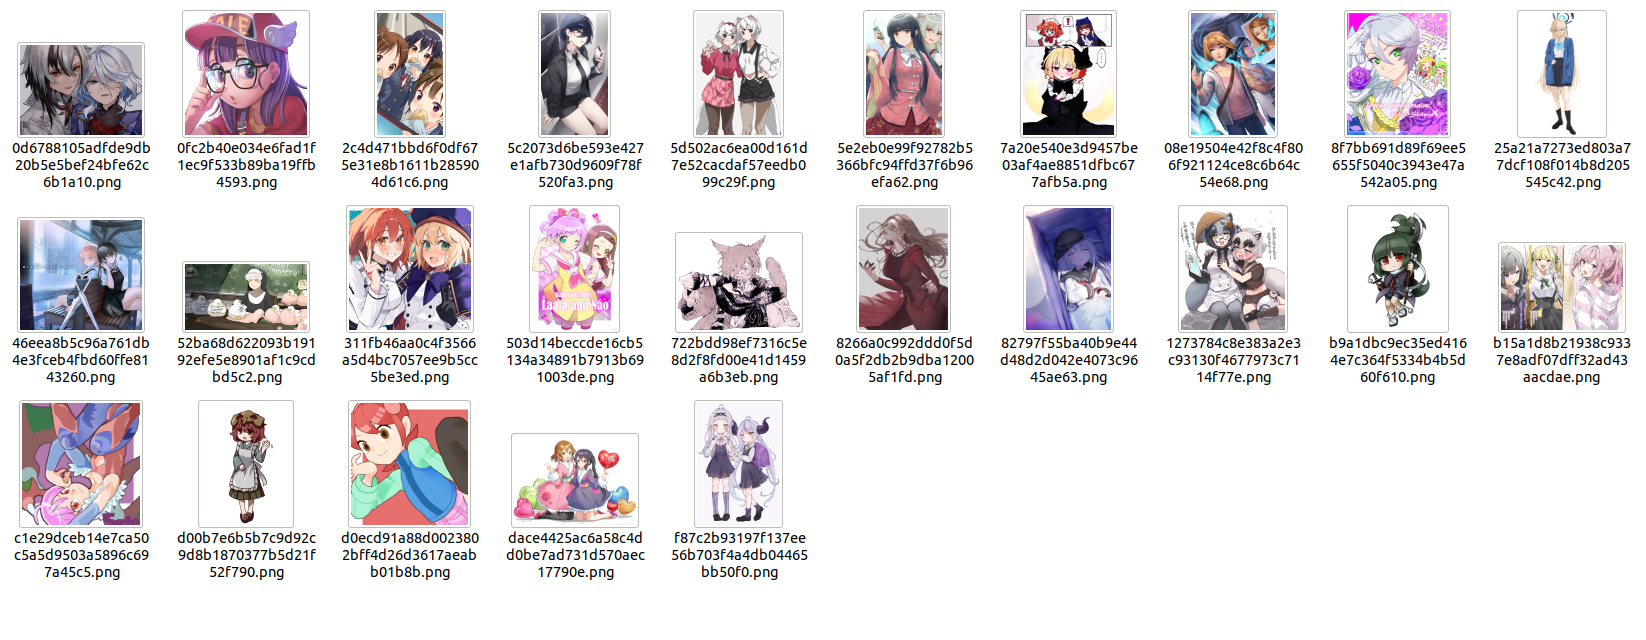
The effect is shown in the image below. Seven irrelevant images are randomly removed from a total of 32 images:
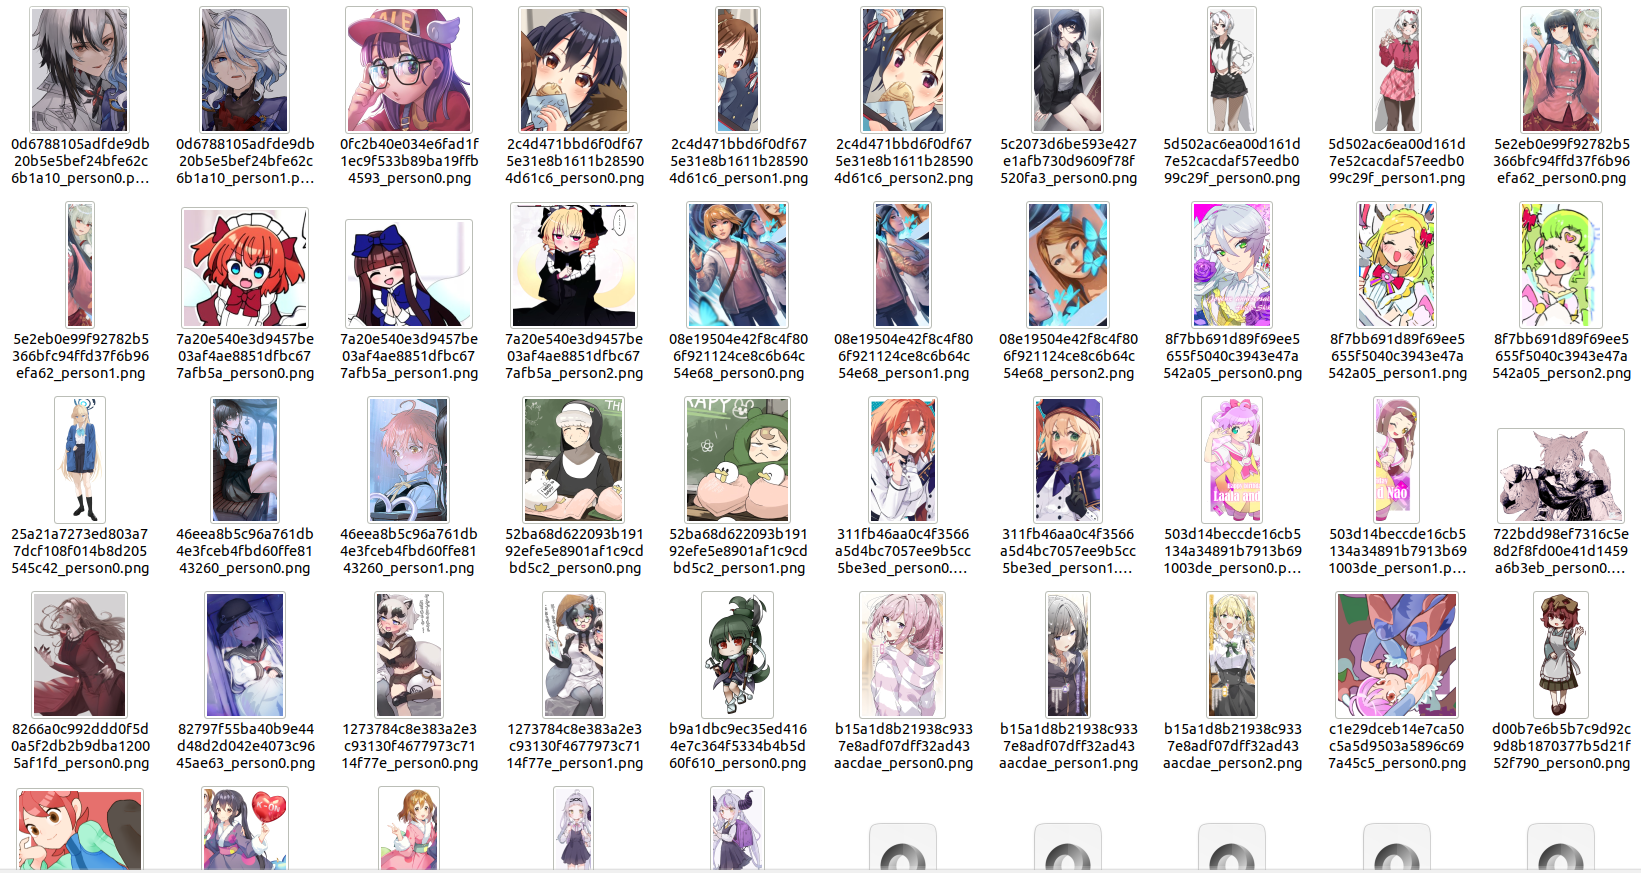
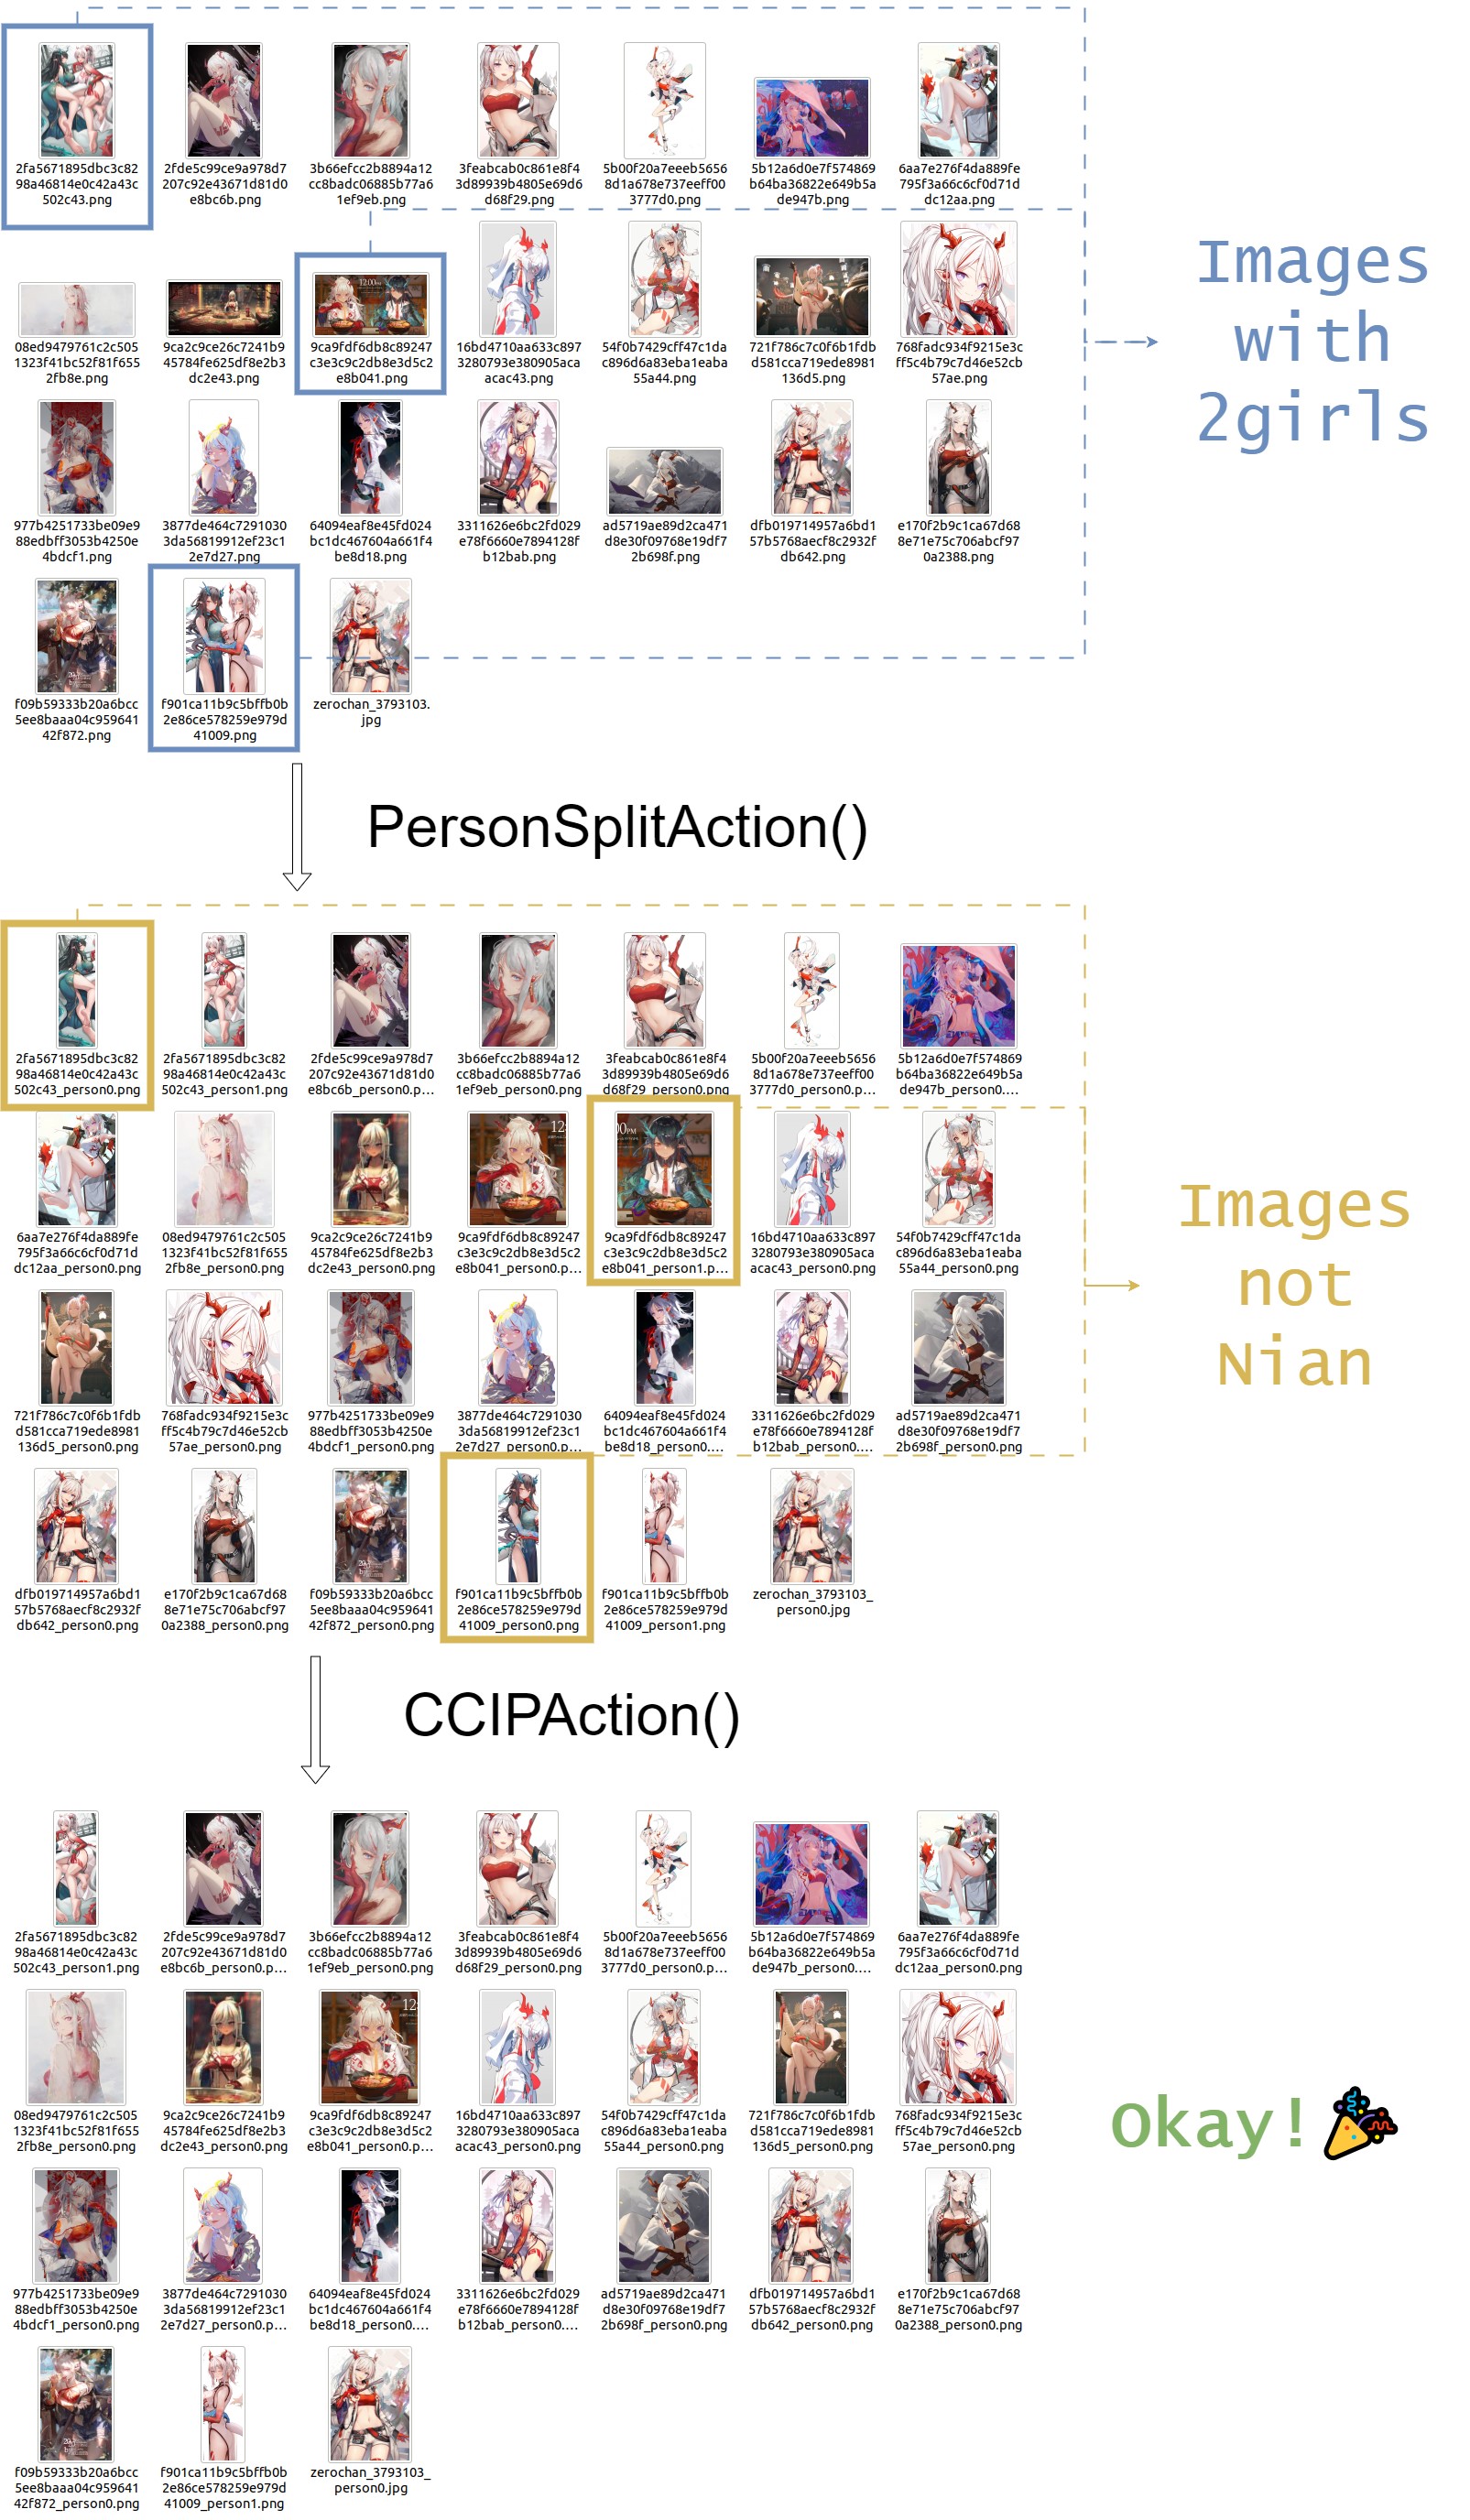
Moreover, when we stack PersonSplitAction and CCIPAction, we can filter images that contain both single and multiple characters in the data source (which is actually very common). The code is as follows:
 1from waifuc.action import CCIPAction, PersonSplitAction
 2from waifuc.export import SaveExporter
 3from waifuc.source import LocalSource
 4
 5if __name__ == '__main__':
 6    source = LocalSource('/data/raw')
 7    source = source.attach(
 8        PersonSplitAction(),
 9        CCIPAction(),
10    )
11
12    source.export(SaveExporter('/data/dstdataset'))
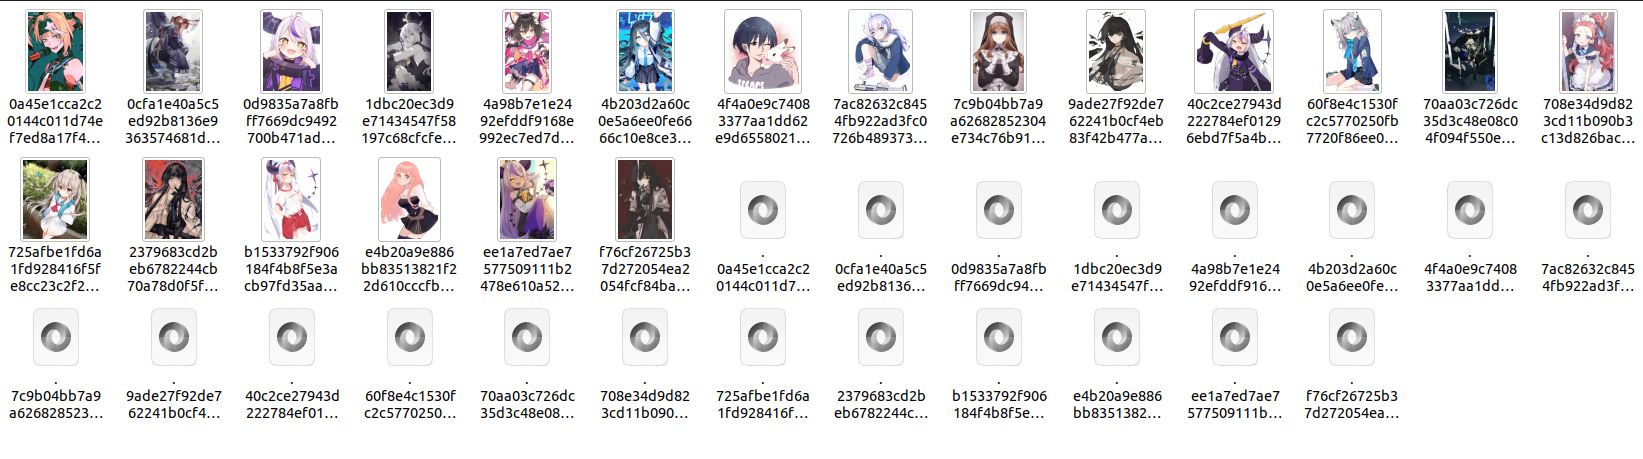
The effect is shown in the image below:
Note
By default, make sure the data source can provide at least 15 images. The CCIP model needs a certain number of images for cross-validation to determine the main character in the data source. If an insufficient number of images is provided, all images will accumulate in the
CCIPActionstep, preventing them from entering subsequent actions.The effective prerequisite for
CCIPActionis that the data set contains exactly one main character (i.e., the character the user wants to obtain data for), and the proportion of this character in the data source should not be too low (ideally not less than 60%). The CCIP model needs to use clustering algorithms to determine the main character in the data source to filter all images. If the data source does not satisfy this characteristic,CCIPActionwill take a long time to determine the main character, resulting in image accumulation.
AlignMinSizeAction
When the data source contains images that are too large, but large-sized images are not needed during training, and storage space needs to be saved as much as possible, you can use AlignMinSizeAction to compress large-sized images. The code is as follows:
 1from waifuc.action import AlignMinSizeAction
 2from waifuc.export import SaveExporter
 3from waifuc.source import LocalSource
 4
 5if __name__ == '__main__':
 6    source = LocalSource('/data/raw')
 7    source = source.attach(
 8        AlignMinSizeAction(800),
 9    )
10
11    source.export(SaveExporter('/data/dstdataset'))
The above code scales images with a short side length greater than 800, maintaining the original aspect ratio, so that the short side length becomes 800. For images with a short side length not exceeding 800, no modifications are made.
RandomFilenameAction
In some cases, to keep the processed image data in a shuffled state, avoiding the sequential loading of images in the model training script, we need to shuffle the images. In waifuc, you can use the following code to randomly rename all the images:
 1from waifuc.action import RandomFilenameAction
 2from waifuc.export import SaveExporter
 3from waifuc.source import LocalSource
 4
 5if __name__ == '__main__':
 6    source = LocalSource('/data/raw')
 7    source = source.attach(
 8        RandomFilenameAction()
 9    )
10
11    source.export(SaveExporter('/data/dstdataset'))
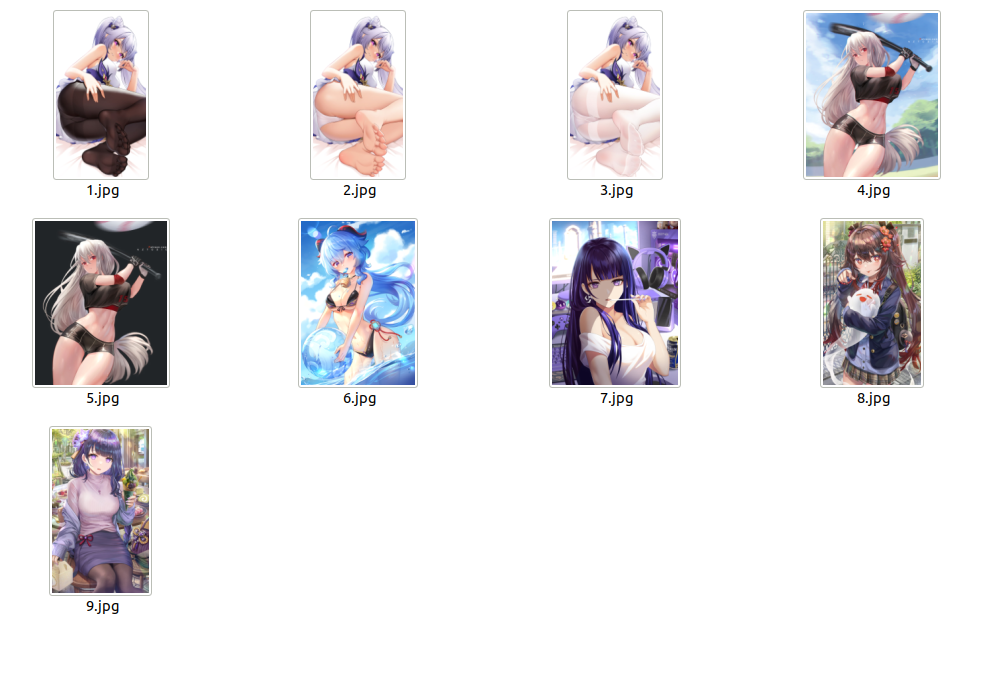
ThreeStageSplitAction
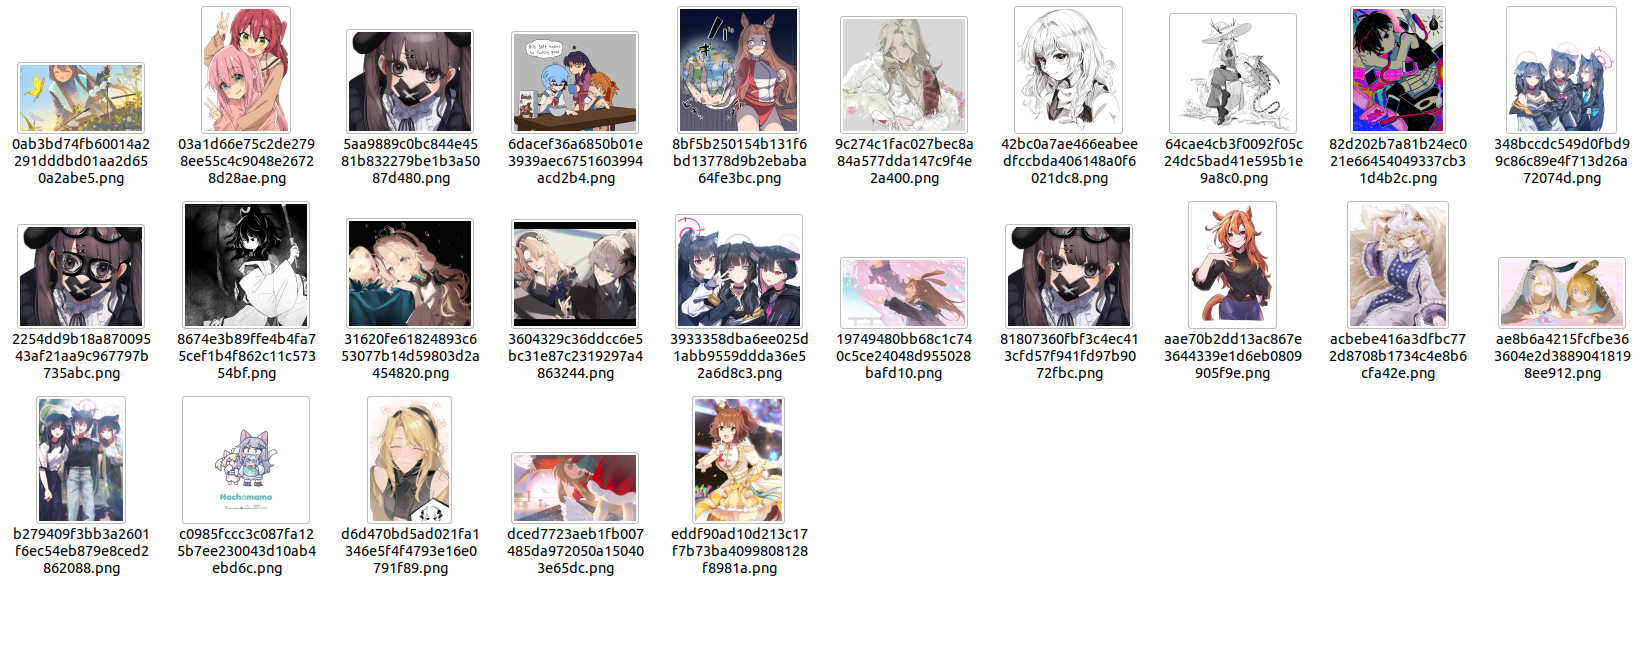
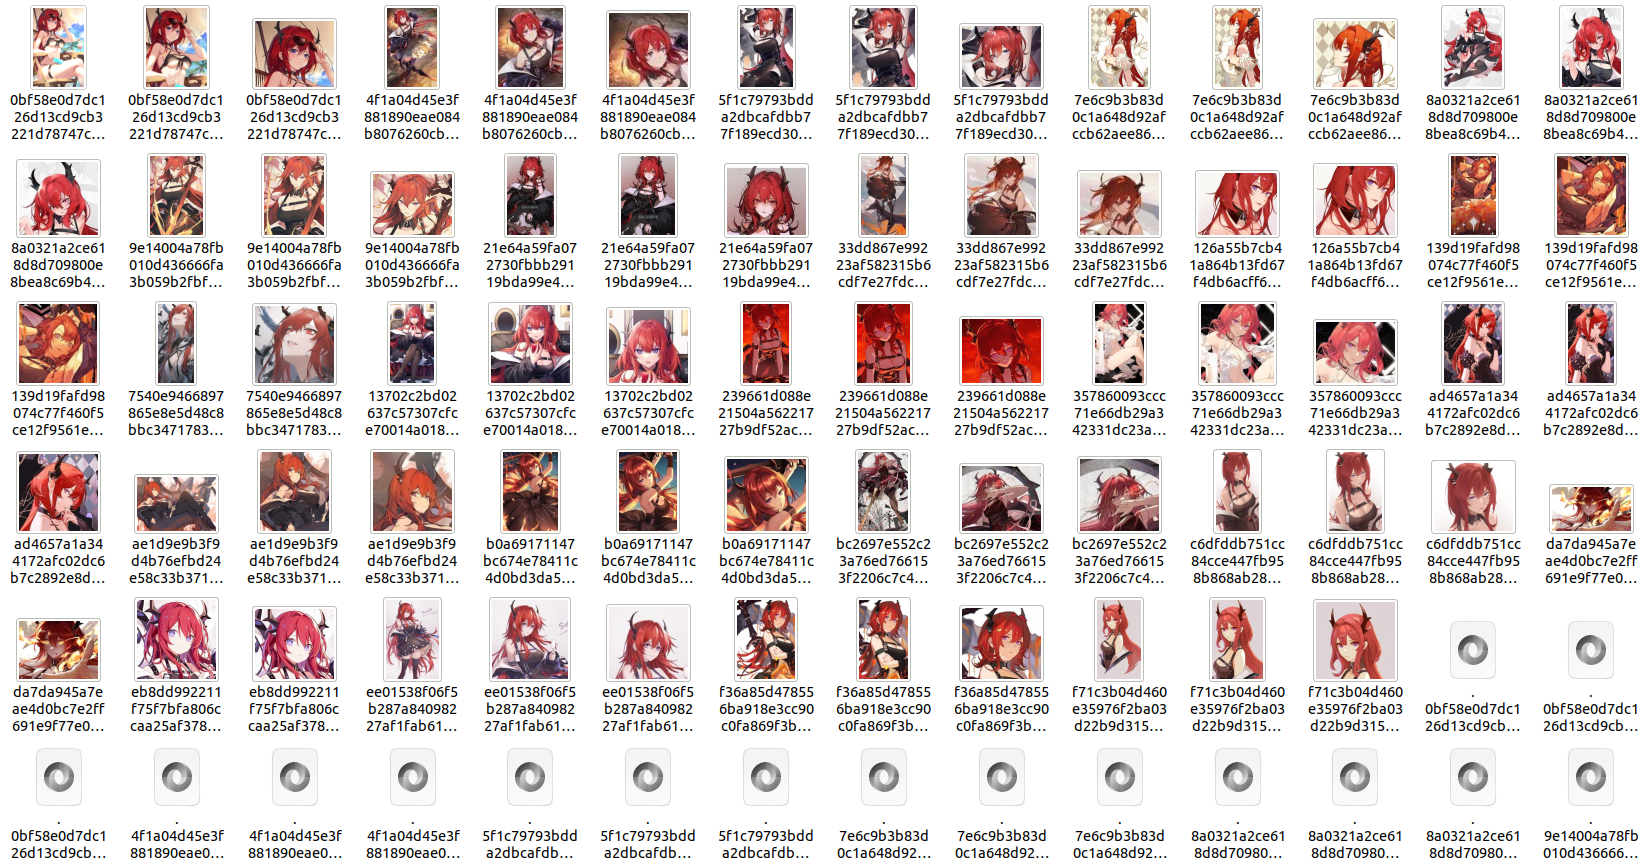
In some experiments related to LoRA character model training, it has been preliminarily proven that splitting the same portrait image again for model training can improve LoRA’s generalization and enhance the fidelity of character details. Therefore, waifuc also supports such operations. For example, for the following set of images:
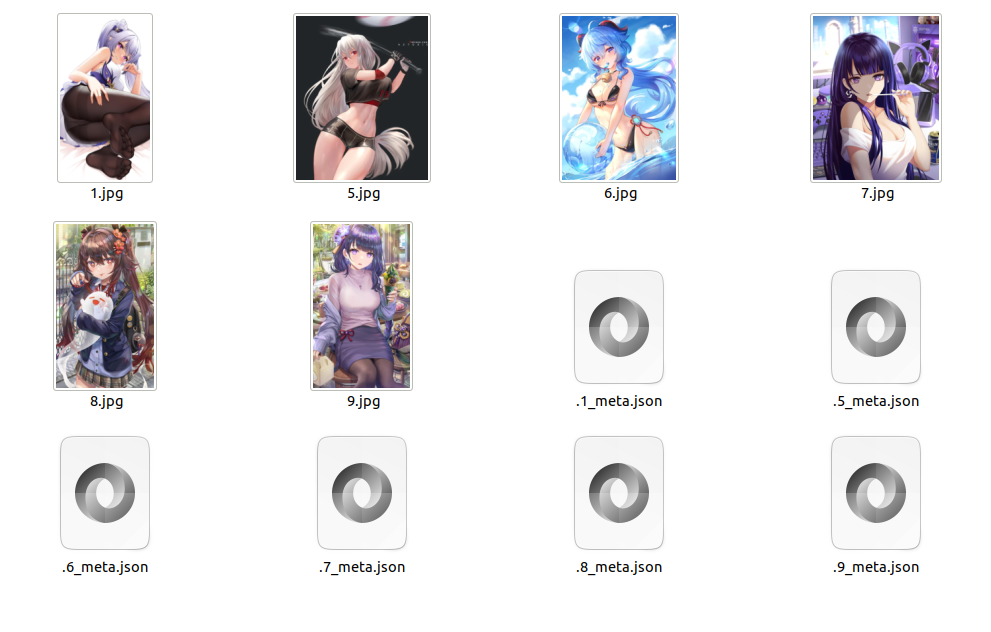
You can use ThreeStageSplitAction to split the images into full body - upper body - head, as shown in the code below:
 1from waifuc.action import ThreeStageSplitAction, FilterSimilarAction
 2from waifuc.export import SaveExporter
 3from waifuc.source import LocalSource
 4
 5if __name__ == '__main__':
 6    source = LocalSource('/data/raw')
 7    source = source.attach(
 8        ThreeStageSplitAction(),
 9        FilterSimilarAction()
10    )
11
12    source.export(SaveExporter('/data/dstdataset'))
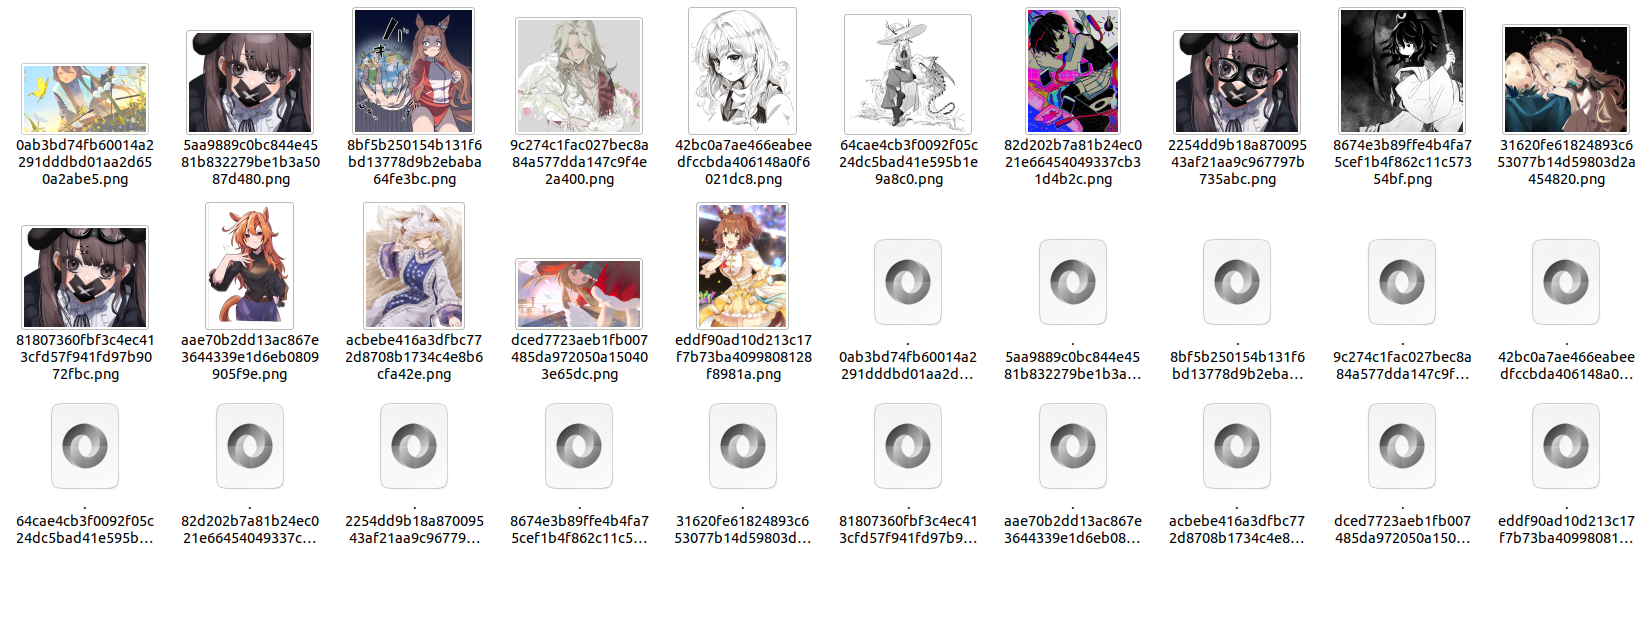
The FilterSimilarAction can filter out highly similar sub-images that may appear after the split. It is recommended to add this action. The final processed dataset looks like this:
Other Actions
In fact, waifuc supports more than just the several actions mentioned above. You can find more actions in the source code.
Additionally, actions are customizable, meaning you can customize the actions you need and add them to the processing pipeline. Details about this will be explained in the subsequent content.